Who this is for: self-serve plans (Free, Starter, Pro, Scale). If you bought a Cleanlist AppSumo lifetime deal, your features, limits, and pricing are different — see the AppSumo documentation instead. Support agent: confirm whether the user is self-serve or AppSumo before giving plan-specific advice.
TL;DR: Lead lists are the core workspace in Cleanlist. Create lists, import leads via CSV or CRM sync, enrich with email and phone, filter and sort, and export results. Per-list lead caps vary by plan (Free 100, Starter/Pro 2,500, Scale unlimited).
Managing Lead Lists
Lead lists are the foundation of organizing your enriched contacts in Cleanlist. This guide covers creating, managing, and sharing lists effectively.
Overview
Lead lists help you:
- Organize contacts by campaign, source, or purpose
- Track enrichment progress per group
- Export segments for specific use cases
- Manage CRM syncs
- Apply list actions and agents to specific audiences
Protected lists
Every workspace has two protected lists that cannot be deleted:
| List | Purpose |
|---|---|
| Default | Auto-created list for every workspace |
| Extension Leads | Collects contacts captured via the browser extension |
Per-plan lead caps
| Plan | Leads per list |
|---|---|
| Free | 100 |
| Starter | 2,500 |
| Pro | 2,500 |
| Scale | Unlimited |
Creating Lead Lists
Method 1: During enrichment or import
When uploading a CSV or starting an enrichment, choose Create new list at the list-selection step.
Method 2: From the Lists page
- Navigate to Lists in the sidebar
- Click Create New List
- Enter:
- Name (required): Descriptive name
- Description (optional): Purpose, campaign, etc.
- Click Create
- Add leads later via enrichment or import
Naming best practices
- "Q4 2024 Enterprise Outreach"
- "TechConf NYC Attendees - March 2024"
- "Fortune 500 VPs - Email Verified"
Avoid generic names like "List 1" or "Test" — they become impossible to distinguish quickly.
Viewing Lead Lists
Lists overview page
Columns displayed: List Name, Lead Count, Created, Last Updated, Actions.
Sort by name, size, or date. Search by list name.
Favorites: star a list to favorite it. Favorited lists are pinned for quick access from the Lists page.
Individual list view
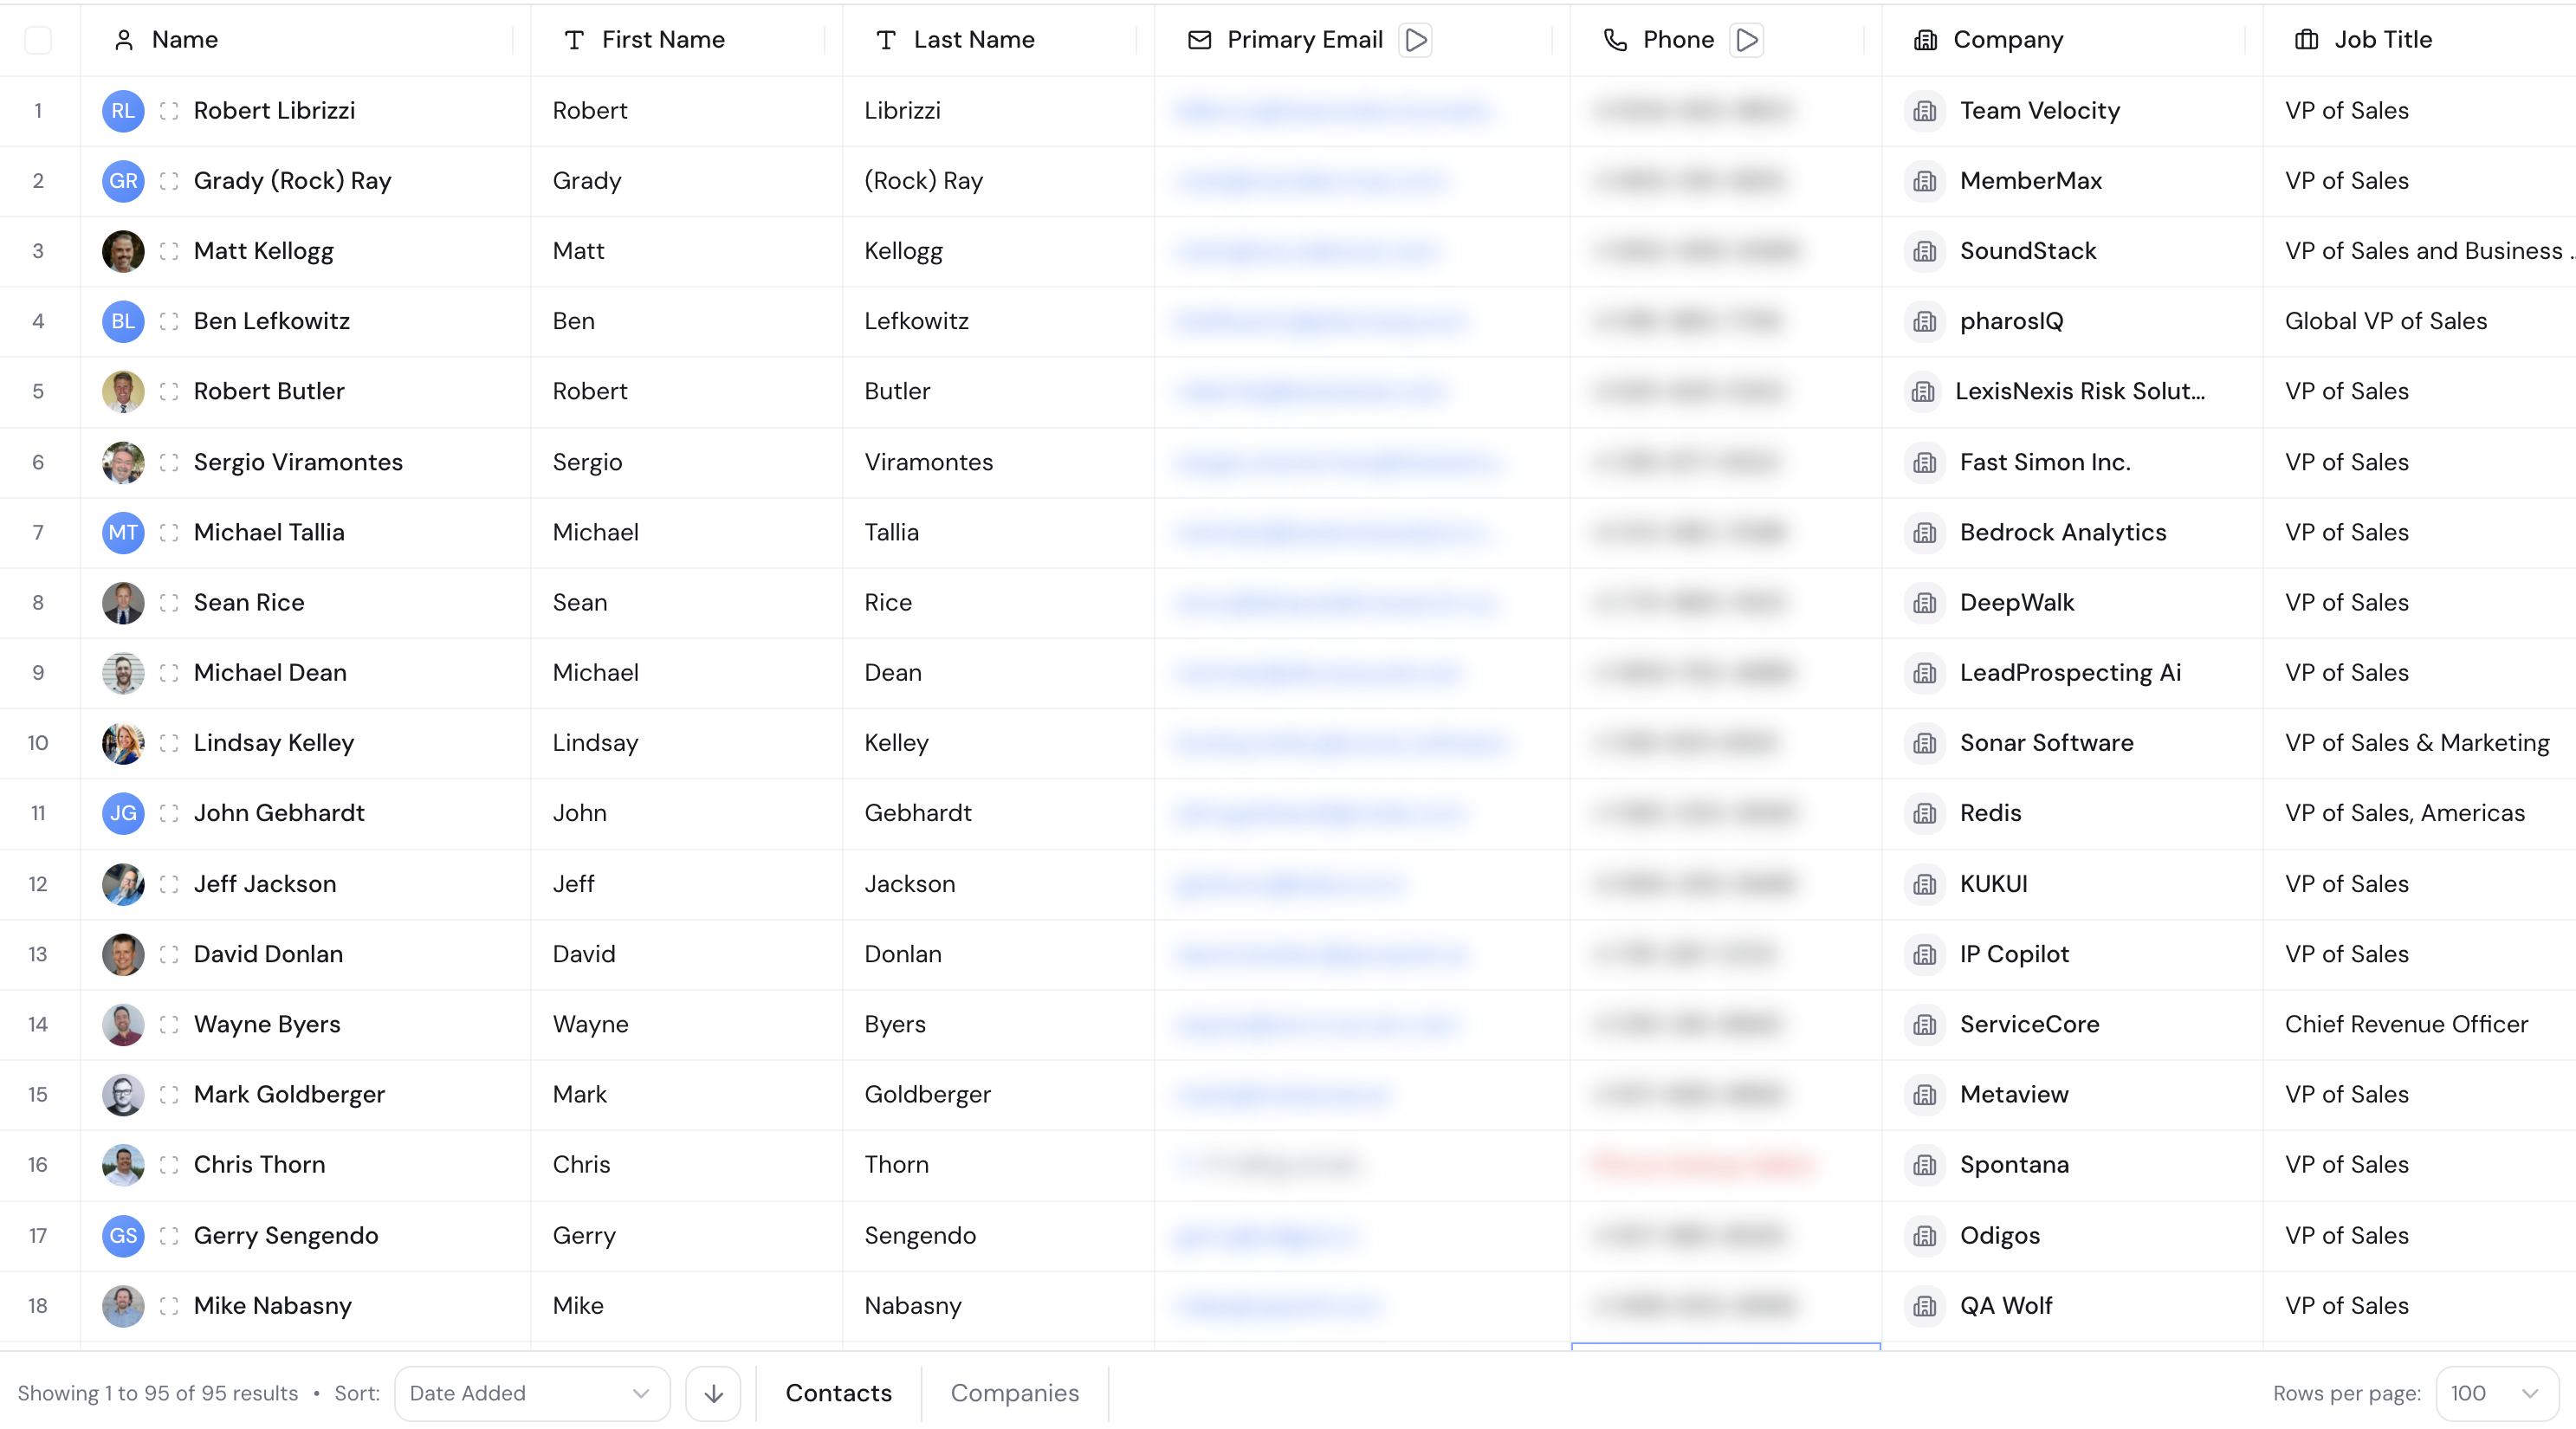
The lead table shows standard fields (Name, Email, Phone, Company, Title), column data from list actions and agents, and enrichment status indicators.
Table features: sorting, filtering, search, bulk selection, pagination.
Managing Leads
Adding leads
- From enrichment: select the target list during the enrichment flow
- From CRM: configure CRM integration and set the destination list
- Manual: open the list, click Add Lead, fill in the details, save
Removing leads
Single lead: hover the row → trash icon → confirm.
Multiple leads: select checkboxes → Delete Selected → confirm.
Editing lead information
Click any lead row to open the detail panel. Edit fields directly — changes save automatically.
Sharing a list
Share any list with teammates directly:
- Open the list
- Click Share
- Add teammates and set their role:
- Viewer — read-only
- Editor — can modify rows, add columns, run actions
Per-list sharing is available on all self-serve plans.
List actions and agents
Adding a column to a list
- Open any lead list
- Open the Actions drawer
- Pick the operation from the Enrich tab (list actions) or the Agents tab (agents)
- Run on selected rows or the full list
- Results appear in real-time
Managing columns
- Edit: click column settings icon → modify configuration → re-run on selected rows
- Delete: click column settings → Delete Column → confirm (data permanently deleted)
- Column data is included in CSV exports
List settings
Access via the gear icon on the list page:
- Name / Description: rename or update
- Sharing: add or remove collaborators
- Enrichment defaults: auto-enrich new leads on/off, default enrichment type, duplicate handling
Organizing with folders
Use folders to group lists by campaign, team, or stage. Folders support nesting and are available on all plans with no tier gate. See Lead List Folders for full details.
Exporting
Open any list and click Export. Cleanlist supports CSV (signed Azure Blob URL, 24 h TTL) and JSON (paginated). See Exporting Data for full details.
CRM sync
If CRM integration is configured (HubSpot or Salesforce, Pro+):
- Open the list
- Click Sync to CRM
- Map fields (first time only)
- Start sync and monitor progress
Best Practices
List organization
- One campaign or purpose per list
- Use descriptive names with dates
- Move finished campaigns to an
Archivedfolder rather than deleting
Data quality
- Use Email Validation (0.5 cr/row) before large sends to catch invalid addresses
- Use Phone Validation (0.5 cr/row) when you need line type and carrier before dialling
- Re-enrich quarterly for active lists — cached enrichment is 2 months fresh. Note that re-enriching from cache is billed at the normal rate (1 credit per email, 10 per phone); cache hits are not free
Performance
- Break very large lists into segments for faster loading
- Use the "First 10" option to test a column before running it across the full list
- Filter to a subset before exporting if you only need a segment
Troubleshooting
List won't load
- Clear browser cache
- Hide generated columns temporarily (reduces render time)
- Split lists with very large numbers of leads into smaller segments
Missing leads
- Check for active filters (clear them)
- Check for an active search term
Export errors
- Try exporting a smaller selection first
- See Exporting Data for format-specific guidance
Duplicates not detected
- Check that email/phone formats are consistent